How to cut a model in QIDI Studio?

In the 3D printing process, we often need to cut the model to optimize the printing effect or adapt to the printer's building volume. Here are some common cutting requirements:
- Split oversized models: When the model size exceeds the printing range of the printer, you can split it into multiple parts, print them separately, and then splice them together.
- Partial printing: If you only want to print a part of the model, you can use the cutting tool to accurately select the area you want to print.
- Create a flat bottom surface: Cutting a model can be used to generate a flat bottom surface, making printing more stable and improving the success rate of printing.
QIDI Studio provides a powerful model cutting tool that allows users to precisely control the cutting position and direction. This tutorial will show you in detail how to use the cutting tool in QIDI Studio to achieve ideal printing results.
Schematic diagram
Before cutting the model:
 After cutting the model:
 The model effect shown in the above picture is achieved by cutting the model. If you want to achieve a similar effect, you can follow the steps below.
Procedure
1.Import your model in QIDI Studio, select the model you want to cut, and click the "Cut" button above to enter the cutting mode.

2.By default, the shear plane may not meet your needs. If you need to shear the model vertically, you can adjust the angle of the shear plane. For example, in this step, you need to enter 90° in box 1 to rotate the shear plane 90 degrees along the Y axis to ensure that the shear direction is as expected.
 3. This step requires moving the cutting plane to the appropriate position. "Move" is the relative offset of the current position of the cutting plane . Each time the moving distance is entered, it will be reset to 0.
We plan to divide this model into 4 parts evenly in the X-axis direction. We need to cut it multiple times and ensure that the size of each part is uniform. So first, we need to cut the model into two parts evenly in the direction of the x-axis. After flipping, the cutting plane is exactly at the midpoint of the model in the x-axis direction, so there is no need to move the cutting plane.
 4. Click to perform the cutting. We have two parts, and we need to continue to cut each part into two equal parts along the x-axis.

 5. After performing steps 1-3 for both components, we get:
 6.After arranging the various components, we get the final model:
 Using Dovetail Cutting Mode
 The above picture is formed by the dovetail shearing mode. It is a special shearing method that can ensure that the separated objects can be reassembled more easily after cutting. Its characteristics are:
- Improve the stability of splicing and avoid loosening or misalignment at the joints.
- In some cases, no additional bonding is required and models made of some materials can be directly plugged in and fixed.
step
1.Once in Cut mode, select Dovetail from Mode.

2.Adjust the angle of the shearing surface. Enter 90° in box 1 to rotate the shearing surface 90 degrees along the Y axis. Select the appropriate tolerance in box 2. It is recommended to reserve a gap of 0.1-0.2mm to avoid the interface being too tight and causing difficulty in splicing.
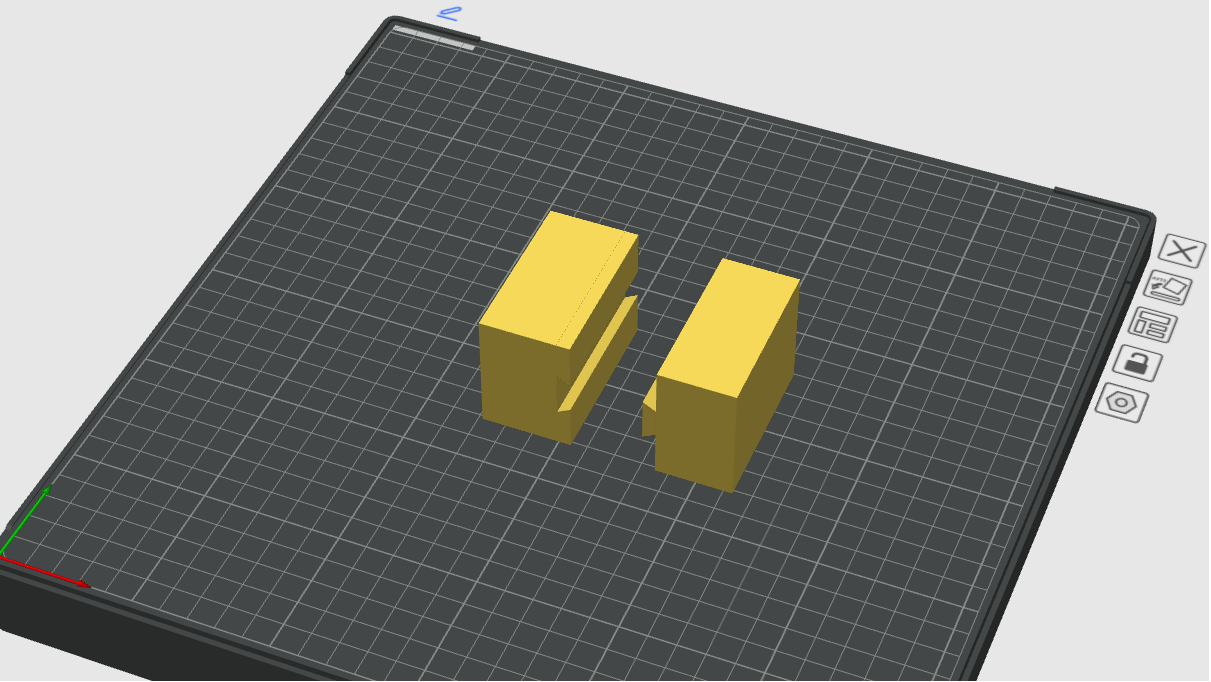
 3.Click "Perform Cut" and get the following model.

Summarize
Through this tutorial, you have mastered the methods of cutting models in QIDI Studio, including standard cutting and dovetail cutting modes. Flexible use of cutting tools can optimize printing results and make the model fit the printer's build volume. Welcome to join the QIDI community , share your works and experiences, and communicate with more 3D printing enthusiasts!